Creating or editing a user profile
If you are an Administrator, you can create user profiles, which allow you to define the permissions and responsibilities that apply to various roles. You can then assign a profile to a user to associate that individual with a particular role. The profile determines which features the user can access, and what they are allowed to do with that feature.
Allocating the access rights for a specific profile makes it easy to control what each user is allowed to do. For example, you might create a profile that would allow a user to create beneficiaries and add payments, but not to approve payments. In that case, another user who has a profile that gives them approval permission would have to review and approve the payments made by the first user.
Creating a user profile
To create a user profile
- In the toolbar, under , click .
- On the page, click .
- In the field, enter a name for the profile. The name can be up to 50 characters long.
We recommend that you choose a name that describes the purpose of the profile. - Click the or buttons in each section to assign permissions to the profile.
- Click .
Editing a user profile
To edit a user profile
- In the toolbar, under , click .
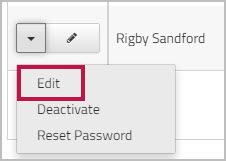
- Beside the profile that you want to edit, click the
 edit icon.
Or choose from the dropdown list.
- Click the or buttons as applicable, to change the permissions for that profile.
- Click .
Note:
-
Updating the may impact your role-based payment approval workflow. Please contact your account representative to update your payment workflow.
Assigning a profile to a user
To assign a profile to an existing user
- In the toolbar, under , click .
- Locate the user to which you want to assign a profile.
You can scroll down the list of users, or you can enter all or part of their name or username in the search fields, and then click . - Beside the user whose profile you want to change, click the
 edit icon.
Or choose from the dropdown list beside the user's name.